HP Printer Troubleshooting Steps: A Comprehensive Guide
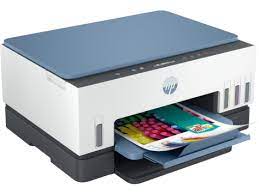
HP printers are renowned for their reliability and high-quality performance. However, even the best printers can encounter issues from time to time. When faced with hp printers troubleshooting steps to resolve the issues efficiently and get back to your printing tasks. In this article, we will walk you through the step-by-step HP printer troubleshooting process to help you tackle common problems effectively.
Step 1: Check Printer Connections
The first and foremost step in troubleshooting any printer issue is to ensure all connections are secure:
Verify that the printer is properly connected to your computer or network.
Check the power cord and USB/Ethernet cables for any damage.
Ensure the printer is powered on and properly plugged into a power source.
Step 2: Update Printer Drivers
Outdated or incompatible drivers can lead to printing problems. Follow these steps to update your HP printer drivers:
Go to the official HP website and navigate to the “Support” or “Drivers” section.
Enter your printer model and download the latest drivers compatible with your operating system.
Install the updated drivers and restart your computer.
Step 3: Clear Paper Jams
Paper jams are common issues that can disrupt printing. Here’s how to clear paper jams in an HP printer:
Open the printer cover and carefully remove any jammed paper.
Gently pull the paper in the direction of the paper path, avoiding tearing.
Close the printer cover and make sure no stray pieces of paper remain inside.
Step 4: Check Ink or Toner Levels
Low ink or toner levels can result in poor print quality or no printing at all. Follow these steps to check ink or toner levels:
Access the printer’s control panel or printer software on your computer.
Look for an ink or toner level indicator to determine the remaining ink or toner levels.
Replace cartridges if they are low or empty.
Step 5: Run HP Print and Scan Doctor
HP provides a handy tool called HP Print and Scan Doctor, designed to diagnose and resolve printer issues automatically:
Download and install HP Print and Scan Doctor from the official HP website.
Run the tool and follow the on-screen instructions to identify and fix printer problems.
Step 6: Perform a Printer Reset
Sometimes, resetting the printer can resolve various issues. Here’s how to perform a reset on your HP printer:
Turn off the printer and disconnect the power cord.
Wait for a few minutes, then reconnect the power cord and turn on the printer.
Allow the printer to initialize and try printing a test page.
Conclusion
By following these step-by-step diagnose hp printer problems, you can efficiently address common printer issues and ensure smooth printing operations. Remember to check connections, update drivers, clear paper jams, monitor ink or toner levels, utilize HP Print and Scan Doctor, and perform a printer reset if necessary. With these troubleshooting steps at your disposal, you’ll be well-equipped to tackle any printer problem that comes your way, keeping your HP printer in optimal working condition. Happy printing