Troubleshooting Guide: Canon Printer Not Printing Black on Both Sides – A Step-by-Step Solution
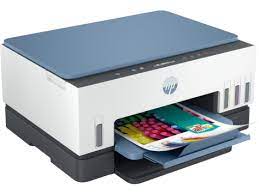
Printing issues can be frustrating, especially when you’re dealing with a canon printer not printing black color both side. If you’re facing this problem, don’t worry – we’ve got you covered. This step-by-step guide will walk you through the troubleshooting process to help you get your Canon printer back to delivering crisp, dual-sided prints.
Keywords: Canon printer not printing black, Canon printer printing issues, troubleshoot Canon printer, dual-sided printing problem, fix Canon printer black ink issue
Step 1: Check Ink Levels
Before diving into complex troubleshooting, start with the basics. Ensure that your printer has sufficient black ink. Navigate to the printer settings on your computer or access the printer’s display panel to check the ink levels. If the black ink is low or empty, replace the cartridge and attempt to print again.
Step 2: Clean the Printhead
Ink buildup on the printhead can hinder proper printing. Canon printers often have a built-in cleaning function that can be accessed through the printer settings on your computer. Run the printhead cleaning utility to remove any dried or clogged ink that may be causing the black not to print.
Step 3: Perform a Nozzle Check
Run a nozzle check to identify and rectify any issues with the ink nozzles. This can be done through the printer settings on your computer. If the nozzle check reveals gaps or inconsistencies in the black ink pattern, initiate a printhead alignment to correct the alignment and improve print quality.
Step 4: Verify Print Settings
Ensure that your print settings are configured correctly. Open the document you want to print and access the print settings menu. Confirm that the document is set to print in black and white and that the double-sided printing option is selected. Incorrect settings can lead to the printer omitting black ink on one side.
Step 5: Update or Reinstall Printer Drivers
Outdated or corrupted printer drivers can contribute to printing issues. Visit the Canon website to check for the latest printer drivers compatible with your printer model. Download and install the updated drivers, or reinstall the existing ones to ensure smooth communication between your computer and the printer.
Step 6: Inspect and Replace the Black Ink Cartridge
Examine the black ink cartridge for any physical damage or leaks. If you find any issues, replace the cartridge with a new one. Sometimes, even a seemingly functional cartridge can cause printing problems, and a replacement may be necessary.
Conclusion:
By systematically working through these steps, you can troubleshoot and resolve the issue of your canon printer troubleshooting guide. Remember to check ink levels, clean the printhead, perform a nozzle check, verify print settings, update or reinstall drivers, and inspect/replace the black ink cartridge. If the problem persists after completing these steps, it may be advisable to contact Canon customer support for further assistance. A well-maintained and correctly configured printer ensures that you get the best results from your Canon device.